Monday, March 21, 2011

Video Killed the Radio Star: My First Internet Video

Last week I submitted an entry in The Green Awards hosted by General Mills Corporation under the company's Green Giant brand.  This contest encourages participants to submit their "great green ideas" in one of four categories including Green Civic Leader, Green Entrepreneur, Green Local Organizer, and Green Parent.  Winners in each category will be announced May 13th in Los Angeles and will collect a $25,000 award to further their ideas.  Each entry must include a 60-second amateur video and a 100-word essay explaining their idea. Entries are judged on creativity and ability to inspire others, impact on community both local and beyond, and rationale for additional funding.  The contest entries will be selected by a panel of judges, but 25% of the judging criteria will be based on popular vote from the general public. (Voting ends Sunday, March 27th.)

This is my first attempt to create a video and I must admit this caused me a lot of anxiety.  Not only was I uncomfortable being recorded on camera, I also had no idea how to compose, record, save, and submit a video.  Here are some tips for anyone else attempting to create an Internet video for the first time.

Tips for Making Your First Internet Video!
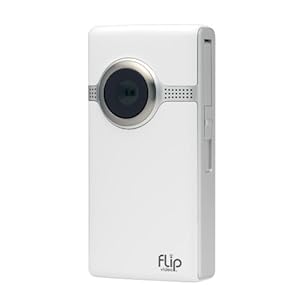
Flip UltraHD

Get a FlipVideo.  This handy little video recorder is great!  I didn't have much time to shop so I went with a friend's recommendation and then read the reviews on Amazon.com to select a model.  I decided to purchase a Flip UltraHD from Amazon.com for about $160 and had it in a few days.

Film Short Takes.  At first I thought I would just roll the camera and blabber on and edit this into a video.  This is not a good idea!  I blabbered on for more than 5 minutes and not only was I very uncomfortable (which shows in the video) but my thoughts were haphazard and unplanned.  I changed my approach to make a series of short takes instead.  Each "take" was planned for 10-20 seconds--short enough so that I could memorize the lines.  I did each "take" 4-5 times until I was comfortable with the flow of my words and inflection.  These multiple short takes also helped calm my nerves which helped me appear much more confident in the video.

Plan an Outline.  It helps to have a plan.  I only had 60 seconds to work with so I attempted to create a 3 or 4 part outline that addressed the questions proposed by the contest writers.  For each heading in my outline I composed 2-3 sentences that I wanted to capture for the video.  Each topic was short enough to memorize so that I could film each segment in just one take.

Pad the Takes.  After my first attempt to edit the segments together I quickly realized that it is much easier to stitch the clips together when I "padded" the start and end of each take with about two seconds of silence.  Let me also add that you should have a comfortable expression on your face!  This "freeze frame" expression is what will appear on the video before it starts playing so it helps to have a nice smile and not have your mouth open.

Eye Contact and Delivery.  I learned that eye contact with video is important.  The FlipVideo is such good quality that it is noticeable if I was attempting to read queue cards even when placed right next to the FlipVideo camera.  As for vocal delivery, the FlipVideo produces video with amazing sound quality.  It helps to speak loudly and clearly.  I was filming in my garage so the sound was well protected from outside noise from wind or traffic. 

QuickTime 7 Pro
Editing and File Size.  I was able to trim the front/end of the takes and stitch them together very easily with the software that comes along with the FlipVideo camera.  I spent about an hour trimming the clips to get the video to fit into a specified 60 second video.  Then I exported the video and quickly realized it was 88,000KB in HD!  I had to get this down to less than 10MB to submit.  My brief searches turned up overwhelming volumes of information on video quality, formats, aspect ratios, etc.  This is all Greek to me still.  I opted to upgrade QuickTime to QuickTime 7 Pro from Apple for about $29.  This application allowed me to convert the video down to less than 2700KB while maintaining the letter box aspect ratio.  The sound quality was unaffected by the conversion, but of course, the video quality deteriorated dramatically.  But that's o.k. as this contest is supposed to be for amateurs!

More Videos?

Now that I have my own FlipVideo and know how to create and edit videos, I am hoping to take on a few more projects for my blog and web site for the Northwoods Casket Company and DIY Coffin.  Here are some of my ideas for projects.

Friday, March 4, 2011

A Brief History of Caskets

Sky Blue 18ga Steel Casket with Brass Trim
A contemporary burial, known as a traditional burial in today's funeral service industry, has an average price tag of more than $6,000.  This includes funeral services, casket, cemetery plot, grave liner, and a monument.    The largest single line item in the cost of a funeral is the casket--the average price paid for a casket in 2010 was $2300.  Just 50 years ago, the average price paid for a casket in the United States was less than $700.  A typical casket used in a funeral today is a painted steel casket with brass hardware and trim and retails for $3400.  In 1900 a typical casket was cloth-covered wood or plain wood and may cost around $16 --about  $400 in today's dollars adjusted for inflation.  Let's briefly explore the history of caskets in the United States.

The casket industry originated in the 1800s when local funeral directors, then known as undertakers or morticians, often operated a local furniture store and built caskets as needed for the families they serviced.  A simple pine coffin in 1840 cost between $2 and $3 (between $40 and $60 in today's currency adjusted for inflation).

While the first metal casket appeared in the United States in 1848, it wasn't until 100 years later in post-war America when the casket manufacturing industry started to change and the market shifted from wood to steel.  In 1848 the US patent office awarded A.D. Fisk a patent for a cast iron casket that was shaped like a sarcophagus and weighed 300 lbs!  Fisk created a rectangular, smooth sided casket in the 1850s that resembles the metal caskets with which we are more familiar today.  Catalogs from the 1850s tell us these early metal  caskets cost upwards from $40 to $170 as compared to the $2 to $3 cost for a pine casket.  Due to the high cost compared to wood, steel would wait almost a century before gaining a significant foothold in the casket market.

During the 1860s, some casket makers began mass producing caskets to meet the demands of the Civil War.  In the late 1800s casket making started to develop as a separate industry with manufacturers of caskets devoting their efforts solely to the manufacture and sale of caskets and coffins.

Caskets didn't change much during the early part of the 20th century with cloth-covered wooden caskets comprising the largest sector of the casket market.  In 1918 Batesville Casket Company (one of today's largest manufacturers) pioneered mass-production techniques with steel caskets that enabled the manufacturer to produce steel caskets cheaper than wooden coffins.  The number of independent casket manufacturers in the United States swelled with the industrial revolution but these manufacturers were local and regional working with local materials.  The use of caskets became standard practice for the transport of fallen soldiers in the wars between the Civil War and WWII.

In the 1940s Batesville and other casket manufacturers refrained from using steel or wood and instead manufactured cloth-covered cardboard caskets in order to conserve steel and wood for the war effort.  By 1948, with the war behind us and the start of the "booming" economy Batesville switched to manufacturing steel caskets exclusively through the 1960s.  This is the beginning of a major shift in the casket market from wood to steel caskets.
A casket lid fabricated using steel stamping techniques.

In the early 1950s, there were more than 700 casket makers in the United States and 75% of caskets were made of wood.   Most caskets were sourced from local materials and more than 20,000 workers were employed in the US casket manufacturing industry.  As assembly line methods perfected by the auto industry rapidly changed the way caskets were manufactured and distributed in America, the share of caskets made from steel grew to more than 60%.  The casket industry also continued to consolidate with about 500 casket manufacturers in existence by the late 1960s.

During the 1970s and 1980s the casket industry experienced mass consolidation through corporate acquisitions.  By 1996 only a dozen manufacturers in the United States supplied more than 90% of the market for steel caskets; and steel caskets continue to make up more than 60% of all caskets sold in the United States.  By 2003 it was estimated that just three companies (Batesville, Aurora, and York Group) produced more than 70% of all caskets sold in the United States.

The "traditional" burial with a steel casket is a tradition that is less 50 years old as is paying upwards of $2500 for a burial casket.  What the funeral industry today has branded a "natural" burial also known as the more trendy "green" burial is actually much more like the "traditional" burial dating back to the mid-1800s and earlier.  Chances are that your ancestors from the 1800s and earlier were buried in simple wooden casket constructed from local materials at an affordable price and buried in a simple cemetery plot without a concrete grave liner.  Call it "natural" or call it "green" but recognize that this growing trend is a matter of returning to the simpler "traditions" dating back as recently as the early 20th century.